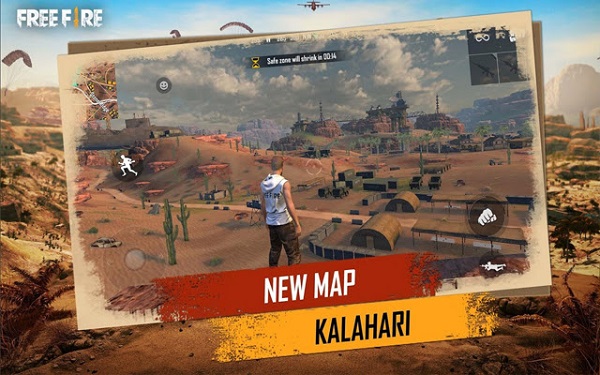
Garena Free Fire offers a variety of maps, each with its own unique challenges and strategies. Among them, Kalahari stands out as one of the most intense and strategically demanding maps. This desert-themed battleground is packed with diverse terrains, strategic locations, and opportunities for both long-range and close-quarters combat. To help you master this map, we’ve compiled a comprehensive guide packed with expert tips and strategies. Whether you’re a seasoned player or a newcomer, this guide will give you the edge you need to dominate in Kalahari.
Introduction to Kalahari in Garena Free Fire
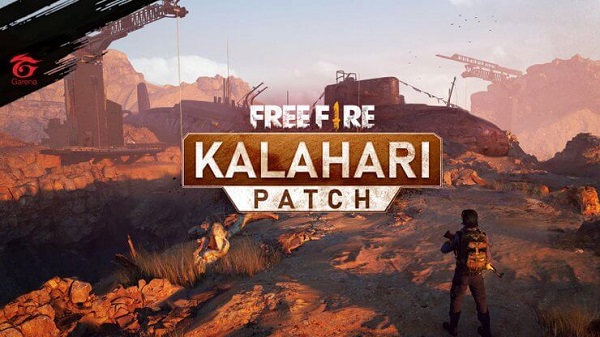
Kalahari was introduced to Garena Free Fire in early 2020, bringing a fresh challenge to players with its arid, desert landscape. Unlike other maps, Kalahari is smaller and more tactical, demanding quick decisions and strategic movement. The map’s unique design encourages aggressive playstyles while still rewarding careful planning and positioning.
Why Kalahari is Unique
Kalahari is distinct from other maps like Bermuda and Purgatory due to its desert environment. The map is filled with open spaces, rocky cliffs, and abandoned structures, making it ideal for both snipers and close-combat enthusiasts. The combination of open areas and tight corners creates a dynamic battlefield where the wrong move can lead to a quick elimination.
The Importance of Strategy in Kalahari
In Kalahari, strategy is key. The map’s smaller size means that players are more likely to encounter each other early on, leading to fast-paced, high-stakes gameplay. Understanding the map’s layout, knowing where to land, and mastering both long-range and close-quarters combat are essential for survival.
Best Landing Spots in Kalahari
The first step to dominating in Kalahari is choosing the right landing spot. Your landing spot will determine the quality of loot you’ll find and set the tone for the rest of the match.
Refinery: The Heart of Kalahari
Refinery is one of the most popular landing spots in Kalahari, and for good reason. It’s centrally located, making it easy to rotate to other parts of the map. Refinery offers high-tier loot, but it’s also a hotspot for early-game combat. If you’re confident in your skills and looking for a challenge, Refinery is the place to land.
Command Post: A Balanced Option
For a more balanced start, consider landing at Command Post. This location offers a good mix of loot and strategic positioning. The elevated terrain provides a great vantage point, allowing you to spot enemies from a distance. Command Post is less chaotic than Refinery, making it a safer option for players who prefer to gear up before engaging.
The Sub: For Stealthy Players
If you prefer a quieter start, The Sub is an excellent choice. Located on the outskirts of the map, The Sub is less frequented by players, allowing you to loot in peace. While the loot here may not be as high-tier as Refinery, you’re less likely to encounter early-game skirmishes, giving you time to prepare for the mid-game.
Understanding Kalahari’s Terrain
Kalahari’s terrain is one of the most challenging aspects of the map. From wide-open deserts to tight urban areas, the terrain requires players to adapt their strategies on the fly.
Navigating Open Spaces
The open spaces in Kalahari can be both a blessing and a curse. While these areas allow for long-range engagements, they also leave you vulnerable to sniper fire. When moving through open spaces, always keep an eye on potential cover, such as rocks or abandoned vehicles. Use these objects to break line of sight and protect yourself from enemy fire.
Using High Ground to Your Advantage
Kalahari is dotted with elevated areas, such as Stone Ridge and The Maze. Securing high ground provides a significant tactical advantage, allowing you to spot and engage enemies from a distance. However, be aware that these areas are also prime targets for other players, so always be prepared for a fight when heading to high ground.
Mastering Urban Combat
Urban areas like Shrine and Santa Catarina are perfect for close-quarters combat. These locations are filled with buildings and tight corners, making them ideal for ambushes. When navigating urban areas, move carefully and always check your corners to avoid getting surprised by an enemy.
Essential Loadouts for Kalahari
Your loadout plays a crucial role in your success on Kalahari. The map’s diverse terrain means that different weapons and gear are more effective in different situations.
Recommended Weapons
- Sniper Rifles: Given the open spaces and high ground opportunities in Kalahari, sniper rifles like the AWM or Kar98k are essential for long-range engagements. These weapons allow you to take out enemies from a safe distance.
- Assault Rifles: For versatility, assault rifles like the SCAR or AK are ideal. They perform well in both mid-range and close-quarters combat, making them a reliable choice throughout the match.
- Shotguns: In urban areas, shotguns like the M1887 or M1014 are devastating in close-quarters combat. Their high damage output can quickly eliminate enemies in tight spaces.
Must-Have Gear
In addition to weapons, certain gear items are crucial for survival in Kalahari. Make sure to prioritize the following:
- Gloo Walls: These are invaluable for creating instant cover in open spaces or during intense firefights.
- Med Kits and Inhalers: Healing items are essential, especially in a map like Kalahari where you’re likely to sustain damage frequently.
- Armor and Helmets: Always prioritize upgrading your armor and helmet to reduce incoming damage and increase your survivability.
Tips for Surviving the Early Game
The early game in Kalahari is all about survival. With players landing close to each other, early-game skirmishes are almost inevitable.
Loot Fast, Move Fast
In the early game, speed is crucial. Once you land, quickly grab the nearest weapon and gear up. Focus on securing a weapon first, then move on to armor and healing items. If you land in a high-traffic area like Refinery, be prepared to engage in combat immediately. The faster you loot, the better your chances of surviving the initial chaos.
Know When to Fight and When to Flee
Early-game engagements can be risky. If you find yourself outgunned or outnumbered, it’s often better to retreat and regroup rather than risk an early elimination. Use the environment to your advantage, taking cover behind buildings or rocks as you disengage from a fight.
Secure a Safe Zone Early
As the play area begins to shrink, securing a safe zone early is crucial. Always keep an eye on the map and start moving toward the safe zone as soon as it appears. Avoid getting caught outside the safe zone, as the damage from the shrinking zone can be lethal, especially in the early game.
Mid-Game Strategies for Kalahari
The mid-game is when things start to get more tactical. By now, the player count has usually dropped, and the remaining players are likely to be better equipped and more skilled.
Rotating Efficiently
Rotating effectively is key to maintaining your advantage in the mid-game. Always be aware of the shrinking play area and plan your rotations early to avoid getting caught in the zone. Use vehicles if available, but be cautious, as they can attract unwanted attention due to the noise they generate.
Controlling Key Areas
Certain areas of the map, such as Refinery and Command Post, can provide a significant advantage if controlled. These locations offer high ground, good loot, and strategic positioning. If you manage to secure one of these areas, hold your position and use it to dominate the surrounding area.
Managing Resources
By the mid-game, you should have a solid loadout, but managing your resources is still important. Make sure you have enough ammo, healing items, and Gloo Walls to sustain you through the rest of the match. If you’re running low, consider engaging in a fight to restock, but only if you’re confident you can win.
Late Game: How to Secure the Win
The late game is where your skills and strategy are put to the ultimate test. With fewer players left, every decision you make is crucial.
Positioning is Key
In the late game, positioning becomes even more important. Try to secure a spot within the safe zone that offers both cover and a good vantage point. Areas like Refinery or Stone Ridge are ideal if they’re within the final circles. Avoid open areas where you can be easily spotted and picked off by snipers.
Stay Patient and Focused
As the play area shrinks, the game becomes more intense. Stay patient and avoid unnecessary risks. Only engage in fights if you’re confident you can secure the kill. In the final moments, every shot counts, and even the smallest mistake can cost you the win.
Final Circle Tactics
When you reach the final circle, it’s all about outsmarting your opponents. Use Gloo Walls to create cover, move strategically, and be ready for close-quarters combat. If you’re in a good position, let the other players fight it out and then clean up the remaining enemies to secure the victory.
 am Play in Kalahari: Tips for Duos and Squads
Kalahari offers a different experience depending on whether you’re playing solo, in duos, or in squads. Each mode requires a slightly different approach to succeed.
Duos: Coordinating with Your Partner
In duos, communication and coordination are key. Always stay close to your partner and share resources as needed. When engaging enemies, try to flank them from different angles to increase your chances of success.
Squads: Working as a Team
In squads, each team member should have a specific role. For example, one player could focus on sniping while another provides support with healing items. Stick together, communicate effectively, and use your numbers to overwhelm enemies. In the late game, consider splitting into pairs to cover more ground and set up flanks.
Reviving and Healing
In both duos and squads, reviving downed teammates is crucial. Always be aware of your teammates’ health and position, and be ready to provide cover while they heal or revive. Remember that a well-coordinated team is much more likely to succeed in Kalahari.
Advanced Tactics for Kalahari
Once you’ve mastered the basics, it’s time to take your game to the next level with some advanced tactics.
Baiting and Ambushing
Kalahari’s terrain is perfect for setting up ambushes. Use loot or vehicles as bait to lure enemies into a trap. Position yourself in a hidden spot and wait for the right moment to strike. This tactic can be particularly effective in high-traffic areas like Command Post or Shrine.
Zone Control
As the play area shrinks, controlling key zones becomes increasingly important. If you’re in a strong position within the safe zone, focus on controlling that area and preventing other players from entering. Use Gloo Walls and other cover to create chokepoints and force enemies into disadvantageous positions.
Mind Games
In the late game, psychological tactics can be just as effective as combat skills. Use smoke grenades, decoys, or even fake footsteps to confuse and disorient your enemies. If you can get inside your opponent’s head, you’ll gain a significant advantage.
Common Mistakes to Avoid in Kalahari
Even experienced players can make mistakes in Kalahari. Avoiding these common pitfalls can help you survive longer and improve your chances of winning.
Overexposing Yourself
One of the most common mistakes is overexposing yourself in open areas. Always be mindful of your surroundings and use cover whenever possible. Avoid running in straight lines, and always be aware of potential sniper spots.
Ignoring the Safe Zone
Another common mistake is ignoring the safe zone. Always keep an eye on the shrinking play area, and plan your rotations early to avoid getting caught outside the zone. Getting caught in the shrinking zone can lead to unnecessary damage or even elimination.
Overcommitting to a Fight
While it’s tempting to chase down every kill, overcommitting to a fight can leave you vulnerable to third-party attacks. If a fight is dragging on too long or attracting too much attention, it’s often better to disengage and reposition rather than risk getting eliminated.
Conclusion: Mastering Kalahari in Garena Free Fire
Garena Free Fire: Kalahari is a map that challenges even the most experienced players. Its unique environment, fast-paced gameplay, and strategic depth make it a thrilling experience every time you drop in. By following the tips and strategies outlined in this guide, you can improve your performance and increase your chances of winning. Whether you’re playing solo, in duos, or in squads, mastering Kalahari will make you a formidable player in Garena Free Fire.
So, gear up, drop into Kalahari, and may the desert winds guide you to victory!