


The Master Brewer’s Manifesto: A Technical Deep-Dive into Tavern Keeper Optimization
In the realm of management simulations, Tavern Keeper stands as a complex clockwork of logistics, social engineering, and architectural efficiency. Unlike surface-level simulators, this title demands a granular understanding of "Pathfinding Friction," "Thermal Comfort Zones," and "Social Cluster Dynamics." To transition from a failing alehouse to a legendary waypoint, one must look beyond the aesthetics of tavern decoration and delve into the underlying math of customer satisfaction and staff fatigue. This guide provides a comprehensive technical breakdown of the systems required to master the simulation, ensuring your establishment runs with the precision of a dwarven forge.
1. The Geometry of Service: Minimizing Pathfinding Friction
The most common cause of tavern failure is not poor ale, but "Pathing Latency." Every step a staff member takes is a calculation of efficiency. In Tavern Keeper, the distance between the storage barrel and the serving counter is the single most important metric for your profit margins. To optimize this, you must implement a "Centralized Hub" layout. By placing the kitchen and the cellar in the center of the building with service hatches facing outward, you reduce the average travel time per order by up to 40%.
Staff pathfinding is also affected by "Obstacle Density." While it is tempting to fill every corner with decorative plants and rugs, these objects create invisible "Navigation Meshes" that slow down movement. A technical pro-tip is to maintain "Three-Tile Arteries"—main walkways that are three tiles wide. This allows staff members to pass each other without triggering the "Collision Recalculation" animation, which often causes waiters to stutter and lose precious seconds during peak rush hours.
2. Thermal Dynamics and the Comfort Coefficient

Customers in Tavern Keeper do not just judge you on your drinks; they judge the "Atmospheric Stability" of your establishment. The game simulates heat dispersion from fireplaces and ovens. If a customer is seated too close to a large hearth, their "Overheating" bar rises, leading to an early departure. Conversely, corners far from heat sources will accumulate "Chill Debuffs." To master this, you must utilize the "Thermal Overlay" view to create "Temperature Buffers."
Advanced Heating Strategies
- The Air-Lock Method: Use double doors at the main entrance to prevent heat from escaping during winter cycles. This stabilizes the internal temperature and reduces the workload on your janitors who would otherwise be constantly tending to multiple fireplaces.
- Functional Zoning: Place high-heat objects (like bread ovens) near walls that share a border with the seating area. This allows the residual heat to bleed through the masonry, providing a gentle "Ambient Warmth" without the harsh radiance of an open fire.
- Ventilation Shafts: In later stages, verticality matters. Placing windows high on the walls creates a "Stack Effect," allowing hot air to escape during summer months and preventing your patrons from becoming irritable.
3. The Psychology of the Pour: Drink Grading and Cellar Logistics
Ale is the lifeblood of your tavern, but not all brews are equal. The game uses a "Complexity Score" for every drink served. A basic lager has low overhead but attracts "Low-Tithe" patrons. To maximize revenue, you must invest in "Multistage Fermentation." This requires a cellar layout that accounts for "Maturation Zoning." Different spirits require different light levels and humidity; placing a delicate wine next to a vibrating meat-hanging rack will lower its quality score.
The Cellar Efficiency Checklist
- Insulated Foundation: Always build your cellar with stone or reinforced clay to maintain a consistent "Cooling Delta."
- Rack Stacking: Use vertical storage to increase your "Volume-per-Tile" ratio.
- The Tap-Line Loop: Ensure your barrels are replenished during "Off-Peak" hours. A waiter spending five minutes changing a keg during a Friday night rush is a catastrophic loss of potential GPM (Gold Per Minute).
4. Workforce Engineering: Personality Traits and Fatigue Management
Managing staff in Tavern Keeper is an exercise in "Trait Synergy." Every hire comes with a set of procedural tags, such as "Social Butterfly" or "Meticulous Cleaner." Placing a "Meticulous" worker in a high-speed serving role is a tactical error; they will spend too much time polishing glasses while orders pile up. Instead, match "High-Tempo" traits with bar work and "Detail-Oriented" traits with kitchen or repair tasks.
Fatigue is not linear. A staff member at 20% energy works at half the speed of one at 100%. Therefore, the layout of your "Staff Breakroom" is as critical as the tavern floor. The breakroom should be geographically adjacent to the busiest work zones to minimize the "Commute to Rest." Equip the room with "High-Density Comfort" items like luxury beds and high-quality meals to ensure that their energy recovery rate is maximized, allowing them to return to the floor faster.
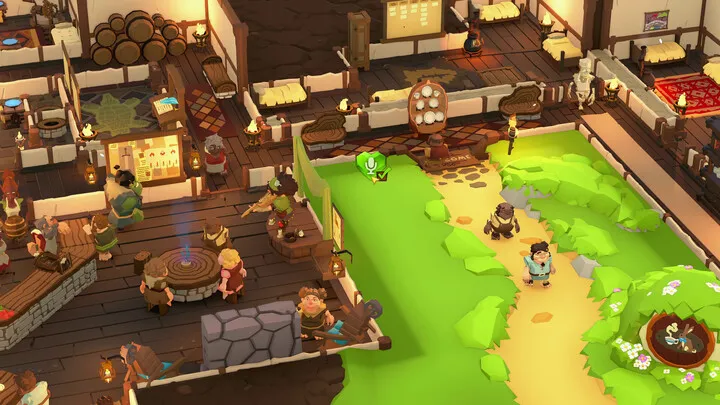
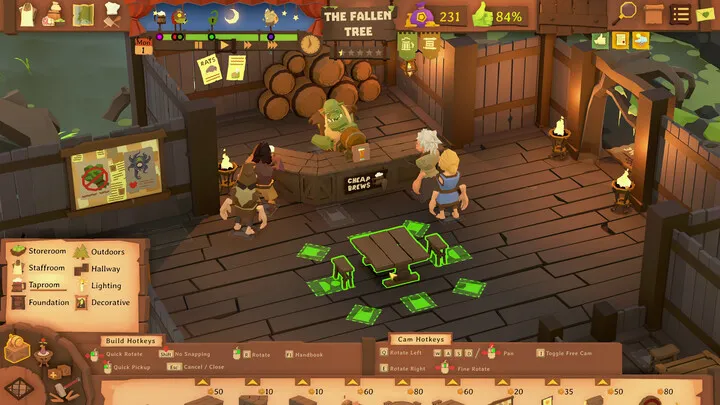
5. Social Cluster Dynamics: Table Arrangement and Conversational Flow
Patrons in Tavern Keeper are programmed to seek "Social Nodes." A lone traveler will look for a stool at the bar, while a party of adventurers will demand a large communal table. If you only provide four-person tables, you lose the "Density Bonus" of single travelers who will occupy a large table alone, preventing a full group from sitting. A master keeper uses a "3:2:1 Ratio"—three small tables, two medium tables, and one large banquet hall for every twenty seats.
Seating Priority and Interaction
- The "Loud" Zone: Place communal tables near the stage or the hearth. This increases the "Boisterous" atmosphere, which certain patron types (like Orcs or Mercenaries) crave.
- Privacy Nooks: Use partitions or bookshelves to create isolated two-person booths. High-status patrons (like Nobles or Mages) will pay a premium for "Privacy Multipliers," allowing you to increase the price of drinks served in these zones.
- The Bar Buffer: Never place tables directly against the serving bar. This creates a "Throughput Clog" where waiters and customers are constantly fighting for the same tiles. Leave a two-tile gap to ensure fluid motion.
6. Menu Architecture: Ingredient Chains and Dish Complexity
The kitchen is a "Processing Engine." Each dish follows a recipe path: Raw Material -> Prep Station -> Cooking Station -> Plate. The technical challenge lies in "Stage Overlap." While a steak is searing, the chef should be prepping the next salad. If your kitchen layout forces the chef to walk across the room between every stage, your "Dish Throughput" will fall below the "Customer Patience Threshold."
Optimizing the Production Line
- The L-Shaped Galley: Arrange the Butcher Block, the Stove, and the Assembly Table in an L-shape. This allows the chef to rotate in place to reach every station, effectively reducing travel time to zero.
- Pantry Proximity: Store non-perishables (flour, salt) in crates directly under the assembly tables.
- Ingredient Tiering: High-quality ingredients increase the "Satisfactory Weight" of a dish. Serving a "Masterwork Stew" can override the negative mood modifiers of a long wait time, acting as a strategic buffer for a busy kitchen.
7. The Economy of Light: Lumens and Mood Modification
Lighting in Tavern Keeper is not purely aesthetic; it is a "Mood Modulator." The simulation tracks the "Lumen Value" of every tile. Dark corners increase the "Shady" rating of your tavern, attracting rogues and criminals who are likely to start brawls. Conversely, a brightly lit hall attracts "Lawful" patrons who spend more but demand higher cleanliness. You must decide on the "Moral Alignment" of your tavern through your light placement.
Strategically, you should use "Warm Light" (candles, hearths) in seating areas to increase the "Cozy" stat, and "Cool Light" (magical lanterns) in work areas to increase staff "Alertness." Avoid "Dead Zones"—tiles with 0 lumens—as these act as "Social Dead-Ends" where patrons are less likely to interact, reducing the overall "Vibrancy" of the room. A vibrant tavern generates more "Word of Mouth" points, which is the primary driver for attracting legendary heroes.
8. Incident Mitigation: Brawl Mechanics and Security Logic
Taverns are volatile environments. The "Aggression Meter" of a patron is influenced by drink strength, noise levels, and their personal traits. When a brawl breaks out, it causes "Structural Damage" and scares off high-paying customers. To mitigate this, you must install "Security Anchors." This isn't just about hiring bouncers; it's about "Architectural Deterrence."
Security and Crowd Control
- The Bouncer’s Sightline: Place the Bouncer's station on a raised platform or a central pillar. The AI's "Threat Detection" radius is based on line-of-sight. If a bouncer can see the whole room, they can intervene 50% faster.
- Breakable Density: Avoid placing expensive, fragile decorations (like crystal vases) near the communal tables where brawls are most likely to start. Use "Heavy Oak" furniture that can withstand a chair-swing.
- The "Peace-Pipe" Effect: Installing high-quality incense or soothing music boxes near high-tension areas (like the gambling dens) provides a "Calming Passive" that slows the growth of the Aggression Meter.
9. Research and Expansion: The Tech Tree of Hospitality
As your tavern grows, you unlock the "Keeper’s Grimoire," a research tree that dictates your long-term viability. A common mistake is rushing for "Bigger Rooms" before unlocking "Logistical Upgrades." Prioritize the "Dumbwaiter" and "Advanced Kegging" early. These upgrades fundamentally change the math of the game, allowing you to move goods vertically and serve drinks faster, which is more valuable than simply having more space for unhappy customers.
The mid-game research should focus on "Specialization." Do you want to be a "Culinarian Hub" or a "Brewmaster’s Sanctuary"? Specializing provides "Stacking Bonuses." For example, the "Vintage Cellar" upgrade provides a 20% price boost to all wines but requires stricter temperature controls. Choose a path that aligns with your current tavern’s geography—a mountain tavern is better suited for hearty stews (meat/root vegetables) than a coastal inn that might specialize in exotic imported ales.
10. Financial Mastery: Tax Brackets and Price Elasticity
The final layer of Tavern Keeper is the "Micro-Economy." Every drink and dish has a "Price Elasticity" score. If you raise the price of ale by 10%, you might see a 5% drop in volume but a 5% increase in total profit. You must find the "Sweet Spot" for every item on your menu. Use the "Sales Analytics" tool to identify "Dead Stock"—items that are taking up pantry space but aren't being ordered—and remove them to streamline your supply chain.
Be wary of the "Luxury Tax." As your tavern's "Prestige" grows, the local lord will demand higher taxes. To counter this, you must maintain a "Profit-to-Prestige Ratio." If you increase your prestige through expensive decorations without increasing your serving efficiency, the taxes will eat your margins. Mastery of the endgame involves "Prestige Capping"—selectively removing decorations to keep your tavern in a lower tax bracket while your upgraded kitchen maintains a high-volume, high-margin output.
Conclusion
Succeeding in Tavern Keeper is a journey from chaos to clockwork. It is a game that rewards the meticulous architect and the strategic economist in equal measure. By mastering the invisible flows of heat, pathfinding, and social energy, you transform a simple room into a living ecosystem. Your tavern is not just a building; it is a machine designed to convert hops and grain into gold and glory. Whether you are managing the temperature of a delicate vintage or the temper of a disgruntled mercenary, remember that every detail matters. The most successful keeper is the one who sees the tavern not as it appears, but as the complex web of variables it truly is. Pour with precision, build with purpose, and may your barrels never run dry.